Showing posts with label how-to. Show all posts

May 23, 2014

Be unique! T-shirt upcycle :) DIY (minor sewing)

Helloooooowww!!

I'm so excited!!
What have I done last weekend? THIS-


Made myself a new great shirts!

So, read further, and learn how to easily up-cycle your old shirts!

April 14, 2014

Super easy and original Tablet/ Ipad/ Ebook cover DIY, for 1$ and done in 10min!


Yes, I kind of forgot about my blog...

In the meanwhile, life has changed a lot.
I lived abroad for half a year, and I could definitely say that 2013 was a year of extremes.
But that is for an other post ;)

Lets start a new DIY! :D Are you excited?
This is such a fast and personal item to make. And it saves you a lot of money!
Lets get started!

January 18, 2013

January-DIY: Golden Leather bracelet!

Well, hello!

As promised, I'll post at least one DIY a month starting this year.
But since it's January, here in Belgium, we students are studying for our finals.

So here is a DIY I did this summer!
This beautiful and easy leather gold chain bracelet!
 

December 28, 2012

Street Photography in Morocco + Making black and white

A few months ago I finnaly found my SD card from my trip to Morocco two years ago!

So I started making some black and whites of some pictures.

Why?
I noticed I made a lot of street pics. And, well, in Morocco streets are very crowded. Making the pics black and white pulls the attention back to the subject of the photo, the people in it.

Unless the colors are important, for example if I want to track attention to clothing or food, I leave it in colors.

I did this with the excellent free program called Paint.NET. It's a lot like photoshop, wich I used to have, but not anymore unfortunately...
Steps you mainly have to do:
1: Composition! You may need to crop a photo. Or put it back straight. But I wouldn't do this a lot. A photo that isn't straight is actually sometimes better than a straight one in street photography.
To crop: select the whole photo, use the "move selection" tool and hold shift while making the selection smaller to keep the same ratio. move around with selection till you are pleased. Then Image->crop to selection.
To turn: select photo, richt click on corners of selection to turn. Then crop.
2: Sometimes I let paint.NET do "Auto levels" (Adjustments->Auto- levels).This doesn't always turn out great, but it does manage to fix the contrast pretty well.
3: Turn it in black and white! (Adjustments->black and white)
4: Play with the contrast and brightness! (Adjustments-> Brightness/contrast) Don't mess with it a lot though. It just sometimes comes in handy with black and white:)

I start to really love black and white!
I know these pics are not super -WOW- pics, but that is what makes it street photography. These pics make great pics not because of their perfectness, but because they aren't perfect at all. They are a mess. They let you FEEL the streets.
Everybody can do street photography, the only special skills you need to have, is to DARE to take a picture, and that you know when and what to shoot.

The beautiful blue burka, tradition for the women in the city Taroudant

Men, and goats:)

old man, selling spices

Love the movement, although it's not a clear shot:)


Donkey!

small street with shoemakers and cloth repairing people:)

kids

For more pics you can visit my Flickr!

December 26, 2012

Macro photography with reverse rings (poor guys macro) explained

Yay!
I got my first macro shots with a reverse ring! :D

I was really surprised how fast I managed to get a clear shot!
It was very challenging working in Manual mode.

But in one evening experimenting with my camera, I already learned a lot.

So, here is a "how-to" for working with macro reverse rings!

1. You need the right lens. You need a manual lens with an aperture ring.What also comes in handy is an Automatic-Manual switch. Why do we need that? The lens is reversed so that switch doesn't function anymore, right? No! (See 5. )

2. Mount the reverse ring on your camera first. And demount it. Just to make sure it fits right. Now mount it again, and than screw the lens on.

3. Turn your camera on. Set the camera on M mode. Set the lens on the biggest aperture it has! (The smallest number) Now, you can look through the viewfinder and try to guess the settings you need and make a composition.

4. The problem with macro is that you don't want a too shallow DOF, Depth of field. This is the area wich is in focus. And I tell you, this is very small with a reversed ring. It's probably 1cm to 5mm. To make the DOF bigger, you'll need a smaller aperture. Ok then, lets make a smaller aperture.
Ow....Our viewfinder turns black, and our picture turns out too dark...
Yes...
So this is why you will either work with a longer shutter speed or with flash. The longer shutter speed is not a good option since we are working MACRO!! Every slight movement will make a blurry picture. And the advantage of a flash is too freeze the image. So turn on that flash!!
I did my pictures for now with the simple pop-up.
I'll soon make a flash extender and diffuser so that the flash will actually point at the subject and wont be that harsh anymore.

5.Ok, our flash is on. But we still can't see anything through the viewfinder! This is where the pin on the backside of your lens comes in handy! Turn the lenses aperture wide open. When you have a A-M switch, turn it to A. Now you can turn the aperture to about f8 or f11 depending on the situation. Push the pin, and....MAGIC! the aperture stops down!

6. We are going to take the picture! Settings ok (ISO,Shutter speed, white balance...)? Aperture wide open? Then immediately push the pin so the aperture stops down, and take the picture!
If you don't have the A-M switch I think you'll have to turn the aperture ring quickly to a higher f stop without moving your camera and take the picture.

I hope this helps!!

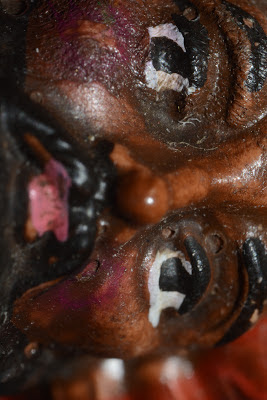
Here are the first pictures I took with this method:
Peacock feather details

a little christmas ornament

plant

Skin on my thumb, iiiiieeeew looks so awkward!

cuticle of one of my fingers

Hair!