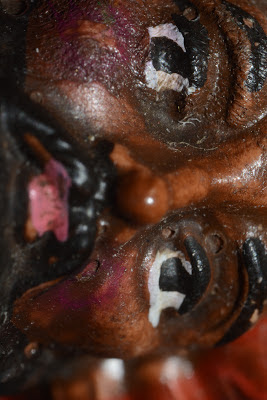
I got my first macro shots with a reverse ring! :D
I was really surprised how fast I managed to get a clear shot!
It was very challenging working in Manual mode.
But in one evening experimenting with my camera, I already learned a lot.
So, here is a "how-to" for working with macro reverse rings!
1. You need the right lens. You need a manual lens with an aperture ring.What also comes in handy is an Automatic-Manual switch. Why do we need that? The lens is reversed so that switch doesn't function anymore, right? No! (See 5. )
2. Mount the reverse ring on your camera first. And demount it. Just to make sure it fits right. Now mount it again, and than screw the lens on.
3. Turn your camera on. Set the camera on M mode. Set the lens on the biggest aperture it has! (The smallest number) Now, you can look through the viewfinder and try to guess the settings you need and make a composition.
4. The problem with macro is that you don't want a too shallow DOF, Depth of field. This is the area wich is in focus. And I tell you, this is very small with a reversed ring. It's probably 1cm to 5mm. To make the DOF bigger, you'll need a smaller aperture. Ok then, lets make a smaller aperture.
Ow....Our viewfinder turns black, and our picture turns out too dark...
Yes...
So this is why you will either work with a longer shutter speed or with flash. The longer shutter speed is not a good option since we are working MACRO!! Every slight movement will make a blurry picture. And the advantage of a flash is too freeze the image. So turn on that flash!!
I did my pictures for now with the simple pop-up.
I'll soon make a flash extender and diffuser so that the flash will actually point at the subject and wont be that harsh anymore.
5.Ok, our flash is on. But we still can't see anything through the viewfinder! This is where the pin on the backside of your lens comes in handy! Turn the lenses aperture wide open. When you have a A-M switch, turn it to A. Now you can turn the aperture to about f8 or f11 depending on the situation. Push the pin, and....MAGIC! the aperture stops down!
6. We are going to take the picture! Settings ok (ISO,Shutter speed, white balance...)? Aperture wide open? Then immediately push the pin so the aperture stops down, and take the picture!
If you don't have the A-M switch I think you'll have to turn the aperture ring quickly to a higher f stop without moving your camera and take the picture.
I hope this helps!!
Here are the first pictures I took with this method:
.jpg) |
| Peacock feather details |
 |
| a little christmas ornament |
 |
| plant |
 |
| Skin on my thumb, iiiiieeeew looks so awkward! |
 |
| cuticle of one of my fingers |
 |
| Hair! |

No comments:
Post a Comment